Embarking on painting walls project is a satisfying DIY endeavour that many homeowners can successfully undertake. The prospect of transforming your living space with a fresh coat of paint is not only cost-effective but also offers a creative outlet. Before diving into this project, it’s essential to familiarise yourself with the proper wall painting techniques and tools to ensure a professional finish.
Choosing from a plethora of quality paint brands makes the process of refreshing your walls a breeze. However, a bit of preparation and understanding of the right painting methods can go a long way in achieving a polished outcome. In our article, 7 Steps to Painting Walls Like a DIY Pro, we’ll guide you through the fundamental instructions for mastering this task.
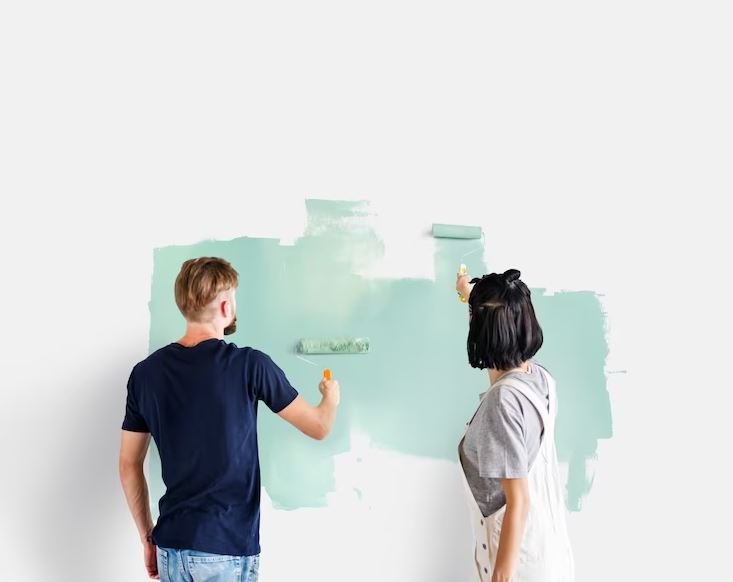
The key lies in utilising effective painting techniques, primarily involving cutting in the edges with a brush and then using a roller to fill in the rest. Collaboration can significantly expedite the process, with one person skillfully cutting in the corners using a brush while the other swiftly follows with a roller to fill in the spaces. This tandem approach minimises the risk of lap marks, ensuring a seamless application of paint without the inconvenience of dried edges.
Our comprehensive guide covers not only the step-by-step process but also valuable insights on how to prepare your walls for house painting. Armed with this knowledge, you can confidently tackle your next painting walls project and achieve professional results. Whether you’re a seasoned DIY enthusiast or a novice looking to enhance your home, our article will equip you with the skills and techniques needed to paint walls like a pro.
Step 1 of Painting Walls: Calculate the Paint Quantity for Your Room Transformation
Embarking on a DIY interior painting project requires meticulous planning, and the first crucial step is accurately measuring your room and determining the amount of paint needed. Whether you’ve gathered inspiration from various living room paint ideas, or you’re simply looking to refresh your space, understanding paint quantities is essential. This step not only ensures a successful transformation but also helps manage wall painting costs effectively.
When estimating the amount of paint required, it’s useful to keep in mind that different paints have different coverage rates per litre, typically around 10-12 square meters. As there is no universal “average room,” a personalised approach is necessary. Follow these simple guidelines to calculate the paint needed for your project:
Measure the Length and Width:
Begin by measuring or estimating the length of the room. A practical method is to step it out, with one adult step approximately equaling 1 meter. Repeat the process for the width, ensuring a comprehensive understanding of your room’s dimensions.
Calculate the Perimeter:
Add two times the length and two times the width together to obtain the perimeter of the room. This calculation provides an essential parameter for determining the total paint quantity required.
Consider Room Height:
Assuming a standard ceiling height of 2.5 meters, multiply the perimeter by 2.5 to convert it to square meters. Adjustments should be made if your room has unusually tall ceilings; in such cases, it’s advisable to measure the height accurately.
Account for Features:
Deduct the areas occupied by large windows, doors, or built-in cabinets from the total square meter measurement. This adjustment ensures that you purchase the right amount of paint, avoiding unnecessary excess.
Factor in Two Coats:
To account for the standard practice of applying two coats of paint, double the overall square meter total. This step ensures that you have sufficient paint to achieve the desired finish without compromising on coverage.
By meticulously following these steps, you’ll have a precise estimate of the paint quantity required for your room transformation. This proactive approach sets the foundation for a successful DIY home painting project, allowing you to move seamlessly to the next steps with confidence.
Step 2 of Painting Walls: Select Your Ideal Color and Optimal Finish
Choosing the right paint colour is a pivotal decision in any DIY painting project. Whether you are drawn to organic, neutral, or bold statement colours, it’s advisable to acquire sample pots to test how the hue interacts with the light in your space. Additionally, pay attention to the paint finish, as different surfaces demand specific results. For instance, mid-sheen and gloss finishes reflect light, while areas like kitchens and bathrooms benefit from moisture and stain-resistant qualities.
Step 3 of Painting Walls: Acquire Essential Tools and Materials
Ensure a smooth painting process by having all the necessary tools and materials on hand. These include a pot of paint, a paintbrush, a paint roller, primer, soap and water for cleaning, a painting tray, a dust sheet, a painter’s masking tape, and, if applicable, a roller extension pole for high ceilings. Optimal tools such as a 2-inch brush for cutting in and a microfiber roller sleeve contribute to achieving a professional finish.
Step 4 of Painting Walls: Clear and Prep the Painting Area
Before diving into the painting process, prepare the space by clearing the area. Safeguard your furniture from splatters or splodges by temporarily storing or covering them. A protective dust sheet, preferably canvas or plastic, is crucial to shield flooring and heavy furniture. Ensure ample painting space by pushing non-essential items to the centre of the room, covering them securely. A well-prepped space minimises the risk of accidental spills or stains.
Prepare your walls meticulously for a flawless finish. Cleaning the surface with warm, soapy water removes dust, cobwebs, or grime that could hinder paint adherence. Resist the temptation to skip this step, as hidden dirt, scratches, or cracks may emerge through the new paint. Address any cracks or holes with filler, and wait for the surface to dry completely. Examine the walls for flakey areas, bumps, or imperfections using filler, sealant, or a scraper to achieve a smooth canvas.
Step 5 of Painting Walls: Apply Painter’s Tape
Once the walls are dry and prepped, use painter’s masking tape or traditional masking tape to cover sockets, switches, and skirting boards. Applying the tape carefully ensures a neat finish, protecting these elements from paint drips and facilitating a clean, professional outcome.
Step 6 of Painting Walls: Prime Your Surface
For a more polished finish and enhanced paint colour, use a primer before applying the final coat. Apply a smooth and even base coat of primer with a roller, working into smaller crevices using a paintbrush. Allow the primer to dry for a few hours before commencing the painting process. Skipping the priming stage, especially when transitioning from a darker colour, may compromise the vibrancy and consistency of the final finish.
Step 7 of Painting Walls: Paint Your Wall with Precision
Embark on the painting walls by working from the top of the room down, adopting a methodical approach like a W pattern. Begin with the ceiling and architrave, then proceed to paint the walls from the top down using a roller. Conclude the project by addressing woodwork and skirting. This systematic approach ensures optimal results, turning your DIY interior house painting project into a professional-grade achievement.
With these detailed steps, you’re well-equipped to paint walls like a DIY pro, achieving a flawless finish and transforming your space with confidence.
Now, if you are looking for a professional house painter who is pro in all these steps and more, rely on 7CPM with a team of skilled residential painters and many years of experience.
For all your painting needs, trust 7CPM to provide excellent house painting services and ensure accurate painting projects.